

But what colours to choose?
There was time for another dive deep into my kite cave down in the basement. Behind a couple of hard stuffed kite bags and some banners I keep a handful of cardboard boxes with fabric.
I headed for the box filled with icarex in various quantities, shapes and colours. Hmmmm… Plenty to choose from.

First Grey
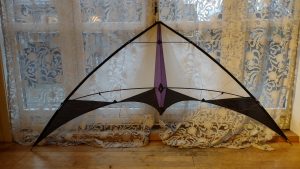
To cut a long story short I ended up with stone grey and deep purple. I think they go well together and being on the dark end of the scale I know the kite will look distinct on video.

Here’s a smart trick I once learned from Anders Matson. In order to allow sewing margin when drawing the templates onto the fabric is to tape two pens or pencils together. Follow the template with one of the pencils and the other one will ‘automatically’ draw a line approximately one cm outside the template. VOILA! You’ve got your margin!


It didn’t take too long until I had finished both drawing and cutting the pieces for the sail.
Now I can start the sewing … or prepare the dacron, net, bungee, … or whatever!

So stay tuned for the progress, ’cause this is to be continued!


0 Responses
> Here’s a smart trick I once learned from Anders Matson. In order to allow sewing margin when drawing the templates onto the fabric is to tape two pens or pencils together. Follow the template with one of the pencils and the other one will ‘automatically’ draw a line approximately one cm outside the template
Good one! The “standard” way ( https://makezine.com/2015/08/22/six-now-why-didnt-i-think-of-that-shop-tips/ ) using a pen and a washer only works for thicker templates (etc..).